How to Create a Houseplant Display Wall
Houseplant Display Wall
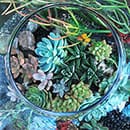
The most common way for houseplants to be displayed are in pots on flat surfaces. But if you're a creative person or want to keep up to date with interior trends then you may already know that houseplants can be displayed in other beautiful ways.

The finished result showing one of our houseplant display walls
Living walls, as the name suggests, are walls completely covered in various plants. It's a fabulous sight and looks like a stunning piece of art combined with a very modern trend.
While they can be a feature in a normal home they're often costly and require a level of effort and ongoing maintenance that some people will find too much.
Our guide below takes the concept of a living wall, scales it down to just five plants and applies it to small vertical wall spaces in a home that ordinarily couldn't accommodate houseplants.
You can easily scale it up for a much bigger space
It's a really simple set up, but still looks good and ongoing maintenance is minimal. The best part is that it's cheap, very adaptable and just requires some entry-level D.I.Y skills to get going.
If you like the concept you can easily scale it up for a much bigger space or load in more houseplants to your design. Whether you copy us exactly or build on our idea, the foundations are the same, so let's get started and show you how to do it.
Step 1
Pick Your Wall
Before you decide what houseplants you want to display or the pots you'd like to use, make sure you know which wall you'll be using. It can be almost anywhere you have vertical space. This could be in your living area, kitchen, hallway, landing, bedrooms or even in a bathroom.
TIP - Your display can be almost anywhere you have dead vertical space.
Once you have the location in mind, the next step is to think about the plants and pots that would suit that area.
The spot in our demo is a narrow strip of wall on a landing that has no nearby windows. Some light does reach the area from windows in other rooms, so it's not an extremely dark spot, but sun loving plants wouldn't survive here for long.
We also thought about the landing having a modern white and airy decor already, so the pots had to fit in with the scheme to stop the whole display looking out of place.

Hi, I'm Tom!
If you're like me and enjoy the challenge of growing houseplants and getting them to thrive, then OurHouseplants can help. This website shares my knowledge and years of growing plants and provides my advice on properly caring for your indoor plant friends.
Step 2
Pick Your Plants
You can use almost any houseplant to display on a wall. They can be trailing or bushy types, large or small or even short or tall. You can also choose the same plant to create eye pleasing repetition in the final design or different plants for each pot to create interest and variety.
The most important rule here is to pick plants that complement your design but also suit the area too. The goal is for the result to be a semi-permanent fixture, so picking plants that don't fit the area's light levels or temperature will mean you'll constantly have to replace sick or dead ones.

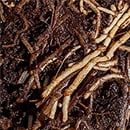
We used Sansevieria Mikado 'Fernwood' for the wall display.
As mentioned in Step 1 because our landing does not receive much sun we needed plants suited to shade. Compact, hardy and tolerant of low light conditions meant a variety of Snake Plant (Sansevieria Mikado 'Fernwood') was the no-brainer choice for the location.
If you've got a similar sort of space in mind and not sure what plants you want to grow, then have a read of our 12 Houseplants For Low Light article for more ideas.
Step 3
Pick Your Pots
Just like your choice of plants, the pots you choose for the wall could be pretty much anything! Go wild with a crazy look, or keep it conventional and more natural with something less bold. Just remember you can't have anything that's too heavy.

Small clean white plant pots enhance and add to the modern look we want.
Three important things to bear in mind when selecting pots. Firstly the location may make it difficult for you to water your plants and water could drip out of pots that don't have a solid base. So choose carefully.
Secondly, the method you use to attach the pots and plants to the wall will have a maximum weight capacity (more about this later), but essentially the pot can't be too heavy or too big, otherwise, it will come falling down and get very messy for you later on.
Finally, it's normally more aesthetically pleasing to the eyes if you group things together in odd numbers. Where as even numbers create symmetry, odd numbers create interest. For example in sets of three or five.
Step 4
Prepare the Pots and Wall
The pot will need attaching to the wall somehow and this will involve some preparation. We opted for 3M Command Strips as they're easy to use and don't damage the wall or pots. The strips can also be easily removed if the design needs to change in the future.
We've linked to Amazon just below for the Command Strips we used if you want to have a look at them. However you don't have to use these and there are bound to be competitors selling something similar if you don't like the 3M brand.

The strips need clean surfaces to adhere to, so this means making sure the pot is washed, clean and dry. The wall also needs to be clean, dry and in good condition so it shouldn't be old and crumbling for example.
Once all is in order you can apply the strips (or whatever you've decided to use) as instructed by the manufacture.
TIP - Not sure if the strips will hold? Get out the measuring scales to weigh the plant and pot to check that they won't be too heavy.
Don't forget to pay attention to the maximum weight the manufacture tells you its product can hold.
Step 5
Attaching the Pots to the Wall
If you use the Command Strips, attaching the pots to the wall should be the easiest bit! The rest of the time before that is spent thinking about your design and preparing.

Attaching the plants to the wall.
The strips we used have a Velcro-like quality and all you need to do is connect the two parts together by pushing the pot onto the partner strip on the wall. They should attach instantly.
Just to be safe, we'd suggest waiting an hour to make sure everything holds before putting the plant into the pot.
Step 6
The Finished Look
Once all the above steps have been followed, that's it. All you need to do is slot the plant into the pot and you're done. Stand back and admire your living wall inspired art piece.

Houseplant Display Wall using Snake Plants in white pots.
In time you may want to swap the pots around, replace with different plants or even expand the design by adding more and more pots to the wall. The beauty of the Command Strip approach compared to drilling holes into the wall is that you can quickly change things up whenever you like.
Bonus
More displays like this
There are hundreds of ways you can set up your displays and you're only limited by your creativity. You can do it with lots of different pots or plants. You can even use larger and stronger strips to set up slightly bigger Urban Jungle displays and use mini shelves. Just be careful not to overload on the weight!

These houseplants are sitting on small shelves.
The above example fills a very narrow space between a wall and a door. It was a void area due to the space in question (around 8inches / 20cm wide), but these mini shelves fill the space perfectly without being overbearing or restricting access to the door and each one holds a small plant pot and plant.
We get asked a lot about these cute mini shelves! They're made by Umbra and you can buy them from Amazon, coming in glossy White or Black. Link below. They come with screw fixtures for extra security, but we've attached these with super strong double sided tape.

If you want to go for bigger displays or want more security, you can attach pots or shelves to the wall with screws. This will let you create and design more robust and potentially more elaborate displays. You can also use much bigger and heavier plants.
Below is another example we set up in our main living space using individual hexagon shelves. These have been attached to the walls with screws which has allowed a very large and showy display. The result is a living piece of art that stands out and makes a bold statement. It looks fantastic and always attracts positive attention from visitors.

This photo shows five small hexagon shelves which are holding a number of houseplants on a wall.
Will you give this a go? Have you tried it already? If you have, please tell us in the comments below and feel free to inspire us with your pictures.
About the Author
Over the last 20 years, Tom has successfully owned hundreds of houseplants and is always happy to share knowledge and lend his horticulture skills to those in need. He is the leading content writer for the OurHouseplants Team.