April 2025
Four small cuttings taken
I took four small stem cuttings from my established Rubber Plant. Each had one mature leaf, a short section of stem and one node. All four went straight into water.

Yes. You can propagate a Rubber Plant from a healthy stem cutting, provided it includes at least one node. The node is the point on the stem where a leaf joins, or previously joined, the plant. It contains the growth tissue needed to produce roots and eventually a new shoot.
There are two common ways to do it:
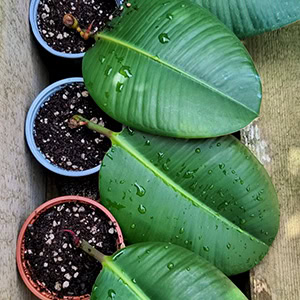
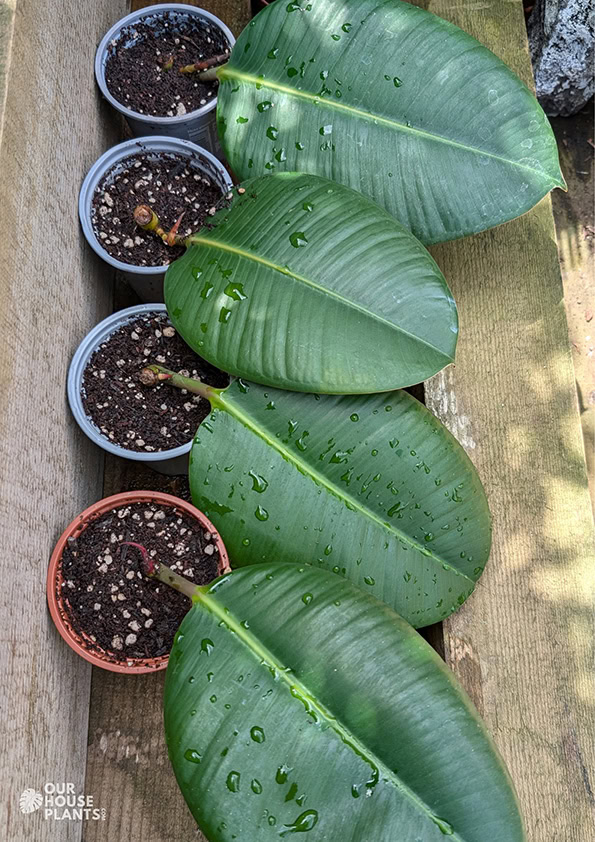
Three fresh Rubber Plant stem cuttings, each with a mature leaf and node, ready to be propagated.
I used the water method for four cuttings taken from my own Rubber Plant in April 2025. Doing it this way let me watch (and take photographs of) the roots as they developed. All four cuttings rooted successfully in water and were potted into compost in early July 2025.
For around 13 months after potting, the cuttings stayed alive but did not produce obvious new leaves. Then, in August 2026, two finally began growing.
That was an unusually long wait, and I have theories about why this was the case which I will explain later. So don't assume every Rubber Plant cutting will take as long as mine. But if your cutting has rooted and appears to be doing nothing, my experience shows why it can be worth keeping.
Rubber Plant propagation at a glance
Yes, you can propagate a Rubber Plant from a healthy stem cutting with at least one node and one mature leaf. You can root it in water or place it directly into free-draining compost. Water propagation is my preferred option because you can watch the roots develop and tell when the cutting is ready to pot up. Keep it warm in bright, indirect light and protect it from drying out completely or sitting in saturated conditions. Once the cutting has a healthy root system and starts establishing, treat it as a young Rubber Plant.
You don't need much equipment for water propagation, the important part is starting with healthy material from a healthy parent plant.
The key to a successful Rubber Plant cutting is the node.
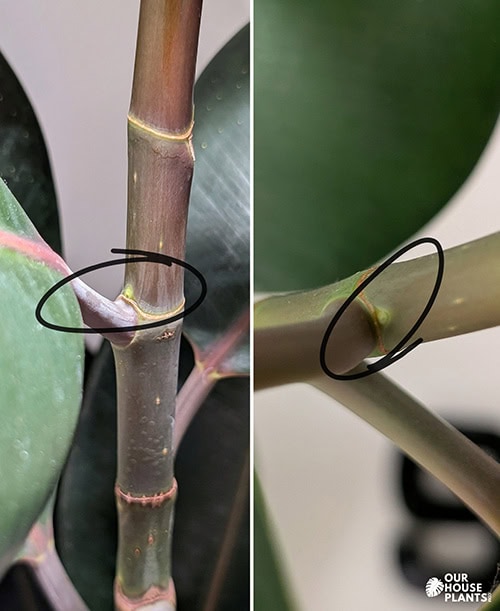
A node is the point on a stem where a leaf joins it, or where a leaf used to grow. It contains growth tissue, including the dormant bud that can eventually produce a new stem and leaves. A leaf on its own may sometimes produce roots, but without a viable node it's unlikely to become a complete new plant.
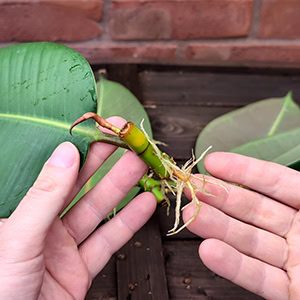
Two different Rubber Plant stems showing a mature leaf and a circled node which shows as a dot just above the leaf stem joint. As long as you have one of these you can proceed with taking cuttings.
Some people will tell you that every Rubber Plant cutting needs several nodes and several leaves to stand a chance. I disagree. I used very small cuttings: one mature leaf, one node and a short section of stem. They took up less space, meant I could make several cuttings from one long stem and gave me a backup if one failed. All four rooted successfully, so several leaves and nodes are not essential.
Would a larger cutting have produced new growth more quickly? Yes, quite possibly. Mine took a very long time to get going after potting, so that's something I would test next time. But if you only have enough stem for small one-node cuttings, don't let that put you off. They can work!
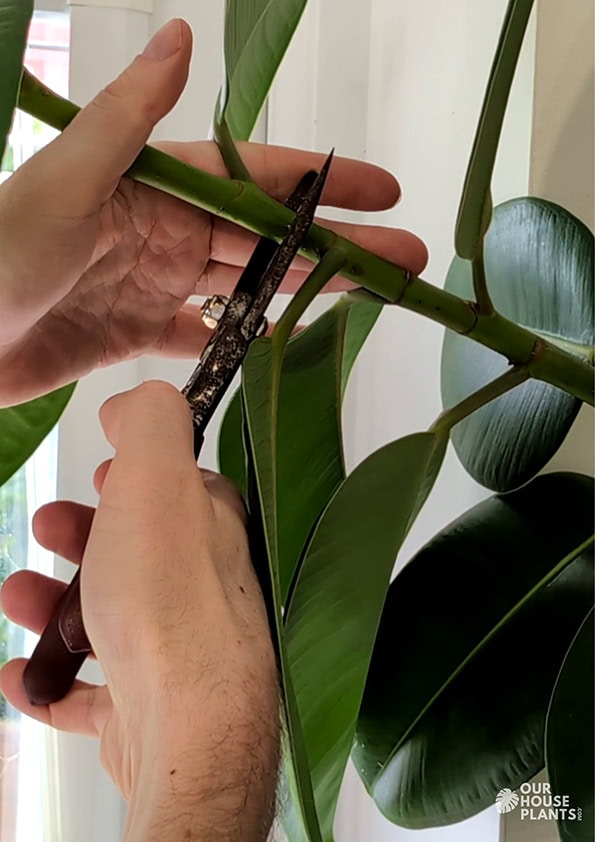
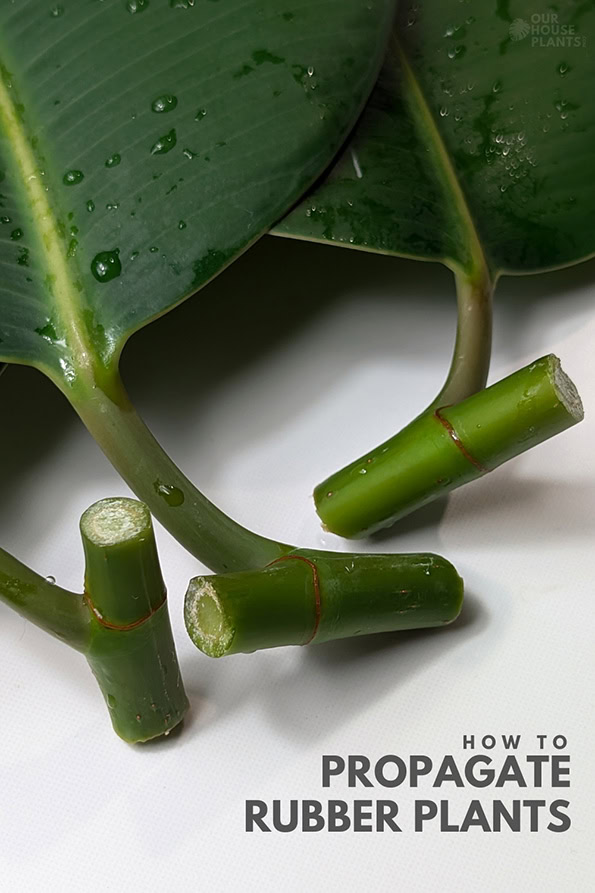
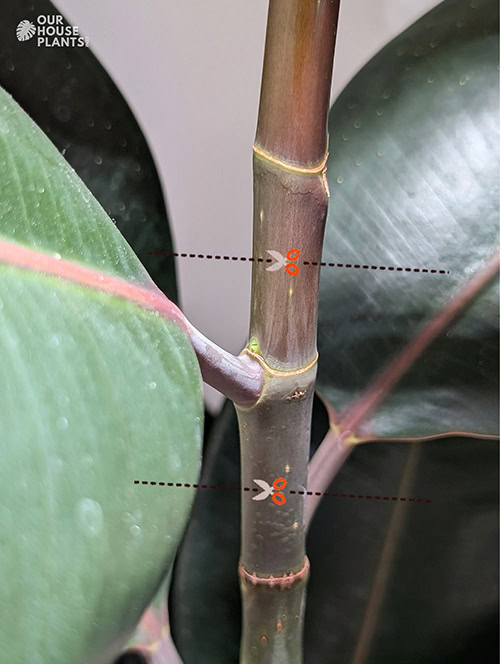
Once you have chosen a healthy stem and identified a node, use clean, sharp secateurs to make one confident cut just below it. Try to avoid using very old "woody" stems as the node may be too old to activate. You want the finished cutting to include a mature leaf, the node and a short length of stem beneath it.
Make the lower cut around an inch below the node so the node remains on the finished cutting. If you are dividing a long stem into several cuttings, make the upper cut above the next node. Each finished cutting needs at least one node, one leaf and a small "chunk" of stem. The first photo at the top of the article shows you what that looks like.
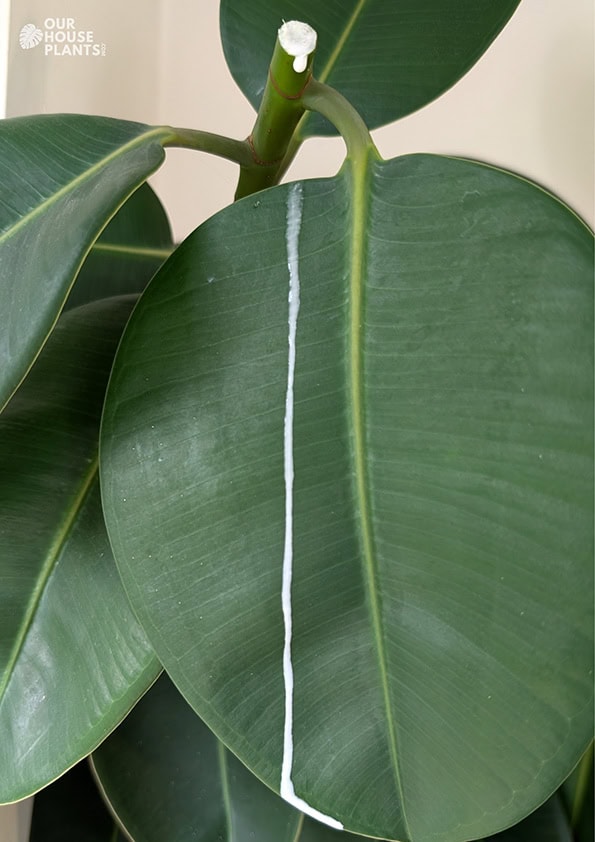
Rubber Plants release a white latex sap as soon as you cut them. This is completely normal. It can flow quite heavily from the parent plant and the cutting, sometimes running onto the leaf below.
To stop the flow, hold the freshly cut end under cold running water for around 10 seconds. It really does work. Once the excess sap has washed away and the cut is no longer actively oozing, you can place the cutting in water or plant it into compost.
The white sap looks dramatic, but it's normal after taking a Rubber Plant cutting. Running the fresh cut under water briefly stops the flow. Make sure you wipe off any sap from the parent plant while it is still wet, if it dries it will stain and ruin the look of the leaf.
Handle the sap carefully.
Rubber Plant sap can irritate skin and eyes, and it can stain surfaces or fabric. Wash your hands after handling cuttings, keep it away from pets and children, and protect nearby furniture if you are taking several cuttings indoors.
Water propagation is straightforward and has one major advantage over rooting directly in compost: you can see what is happening. You can monitor root growth, spot early signs of rot and know when the cutting is ready to pot up.
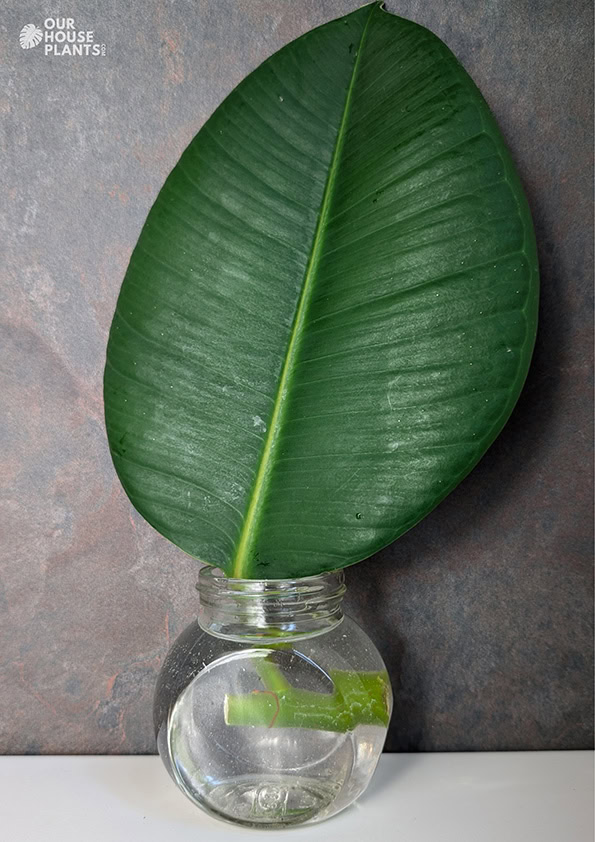
Put the lower stem and node into a clean glass, jar or vase of water. Keep the leaf above the waterline. If the leaf sits in water, it's much more likely to rot.
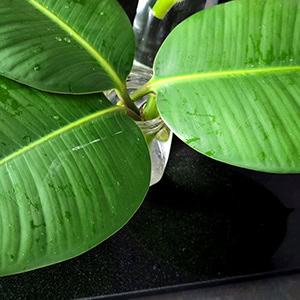
One of my four original Rubber Plant cuttings in water. Each had a short section of stem, one node and one mature leaf.
Place the cutting somewhere warm with good natural light, away from intense direct sunshine. A bright room near a window is often better than placing it directly against hot glass.
Mid-spring through summer is the best time to propagate a Rubber Plant. The warmer temperatures, longer days and stronger natural light give cuttings the best chance of rooting and establishing without a long wait. You can still try at other times of year, but propagation is likely to be slower in a cold room or during winter.
Top up the water if the level drops. Replace it if it becomes cloudy, dirty, slimy or develops an unpleasant smell. If you prefer a regular routine, refreshing it every week or two is sensible, but the condition of the water matters more than following an exact schedule.
Each time you change the water, check the submerged stem. It should remain firm. A soft, dark or slimy base can mean rot is starting.
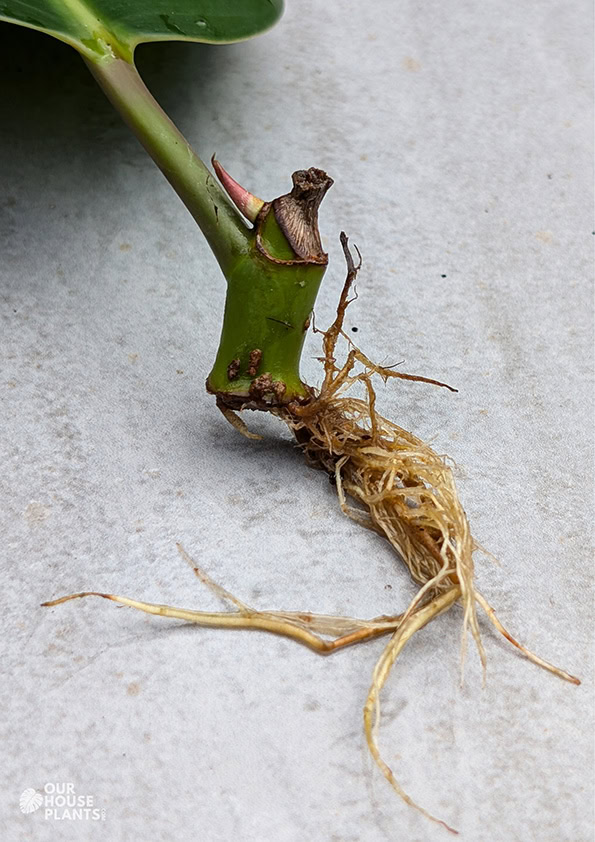
Don't rush to pot the cutting up when the first tiny root appears. Wait until it has several established roots, ideally with some branching. This gives it a better chance of coping with the move from water into compost.
My four cuttings were taken in April 2025. By early July, they'd all grown substantial roots in water and were ready to pot up. In my conditions, that rooting stage took around three months.
Wait for several healthy roots before transferring a cutting to compost, rather than potting it up as soon as one small root appears.
You can also root a Rubber Plant cutting directly in potting mix. This avoids the later move from water to compost, but it means you cannot see the roots forming or easily tell when the cutting has established.
The cutting itself is prepared in exactly the same way: take a healthy section of stem with at least one node and one healthy leaf. If planting directly in soil you need to change the approach slighty.
Choose a small pot with drainage holes and fill it with free-draining houseplant compost. If your compost is heavy or holds a lot of water, mix in some perlite or horticultural grit to keep it open around the cutting.
Water the compost lightly before planting. It should be damp throughout, but not sodden or muddy.
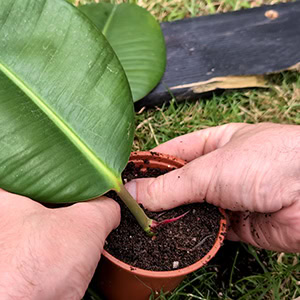
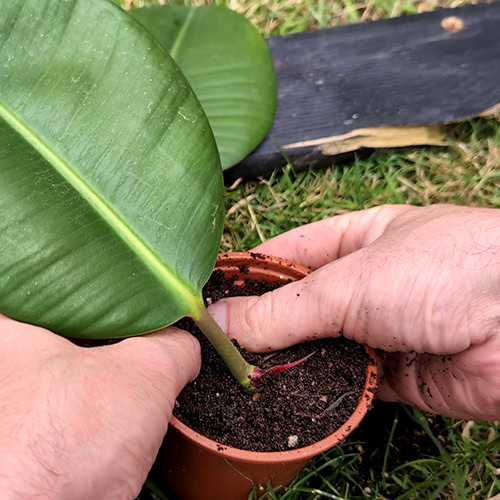
Make a small hole in the compost and insert the lower stem so the node is beneath the surface. Keep the leaf above the compost and firm the mix gently around the stem so it stands upright.
Firm the cutting into place with your fingers and it should hold upright. But if it doesn't or the cutting is tall or top-heavy, a small cane can help support it while roots develop.
Put the pot somewhere warm with bright, indirect light. Avoid hot direct sunlight, particularly while the cutting has no roots to replace the moisture lost through its leaf.
A clear plastic bag loosely placed over the pot, or a small propagator, can help maintain humidity. Don't seal it tightly. Leave some ventilation and remove it regularly to allow fresh air in, otherwise the compost and stem can remain too wet and rot may develop.
Check the compost regularly. It should not dry out completely while the cutting is trying to root, but it should never stay saturated for long periods either.
This balance is the main challenge with direct soil propagation. A cutting without roots uses relatively little water, so a large wet pot can easily stay damp for too long. On the other hand, allowing the small root zone to become bone dry can stop or slow root formation.
Roots are hidden in soil, so judge progress from the cutting itself. A firm stem, healthy leaf and eventual new shoot are all encouraging signs. Do not keep pulling the cutting from the compost to inspect it; that can disturb fragile new roots. After several weeks, gentle resistance when you lightly nudge the stem may mean roots are beginning to anchor it.
Which propagation method is best?
Water propagation is easier if you want to watch the roots develop and know when it is ready to pot up. Direct soil propagation is simpler if you want the cutting to establish in its final growing medium straight away. Neither method guarantees faster new leaves; warmth, light, the health of the cutting and aftercare all matter too.
If you chose water propagation, move the cutting into compost once it has several established roots. If you started it directly in soil, you can skip this stage and simply allow it to keep establishing in the original pot.
Use a pot with drainage holes that is only a little larger than the root system. You do not want an oversized pot full of wet compost, but the cutting still needs enough compost around it to retain some moisture and provide room for roots to grow.
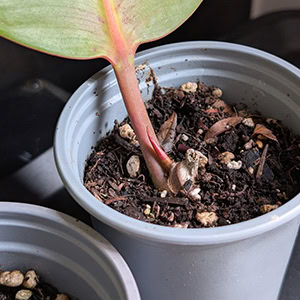
My original containers may have been a little too small and shallow. There was very little compost around the roots, so the mix dried quickly. Later, adding several inches of fresh compost below the existing root balls coincided with new leaf growth.
I can't prove that the extra compost was the single reason the cuttings finally grew, but it would have also increased the available root space, moisture reserve and likely nutrient supply. All good things. I think it's a useful reminder that a small pot should still contain enough potting mix to support a young plant and avoid being picking something too small.
For more on this, see my guide: Do houseplants like small pots?
A normal houseplant compost is fine. If your mix is very dense or holds water for a long time, add some perlite or horticultural grit to improve drainage and air space around the roots.
Handle water-grown roots gently. Set the cutting in the centre of the pot, add compost around it and firm it lightly enough for the plant to stand upright. Avoid pressing the compost down hard around delicate roots.
Water after potting to settle the compost around the roots, then allow excess water to drain away.
When you're potting up, use a small pot, but make sure there is room enough for the roots so to give them space to grow into.
For the first few weeks, aim for lightly and fairly even moisture. Don't keep the compost sodden, but don't allow the entire small root ball to repeatedly dry out completely either. A cutting moving from water into soil needs time to establish before it can cope with the more relaxed watering routine of a mature Rubber Plant.
Once it's actively growing and clearly settled, follow your usual Rubber Plant care routine.
A rooted cutting and a recently potted up plant are not necessarily the same thing. There is a period where it has to establish before it becomes a proper young plant. My cuttings rooted successfully, but their visible growth afterwards was very slow.
I took four small stem cuttings from my established Rubber Plant. Each had one mature leaf, a short section of stem and one node. All four went straight into water.
After around three months in water, all four cuttings had formed substantial roots. The propagation stage itself had worked, so I potted each cutting into its own small container.
For months, the cuttings stayed alive but appeared to do very little above the compost. I later found thrips on the mature leaves several times, and the small pots also dried out quickly.
I moved the pots to a shady, sheltered area of my UK garden. They were outside in brighter natural conditions, but protected from direct sun.
I added several inches of fresh compost beneath the existing root balls. I suspected the original pots held too little potting mix, leaving the roots short of space and causing the compost to dry out too quickly.
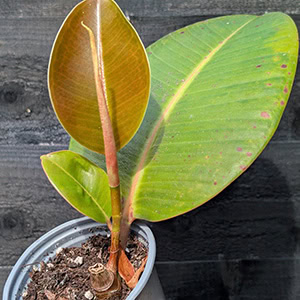
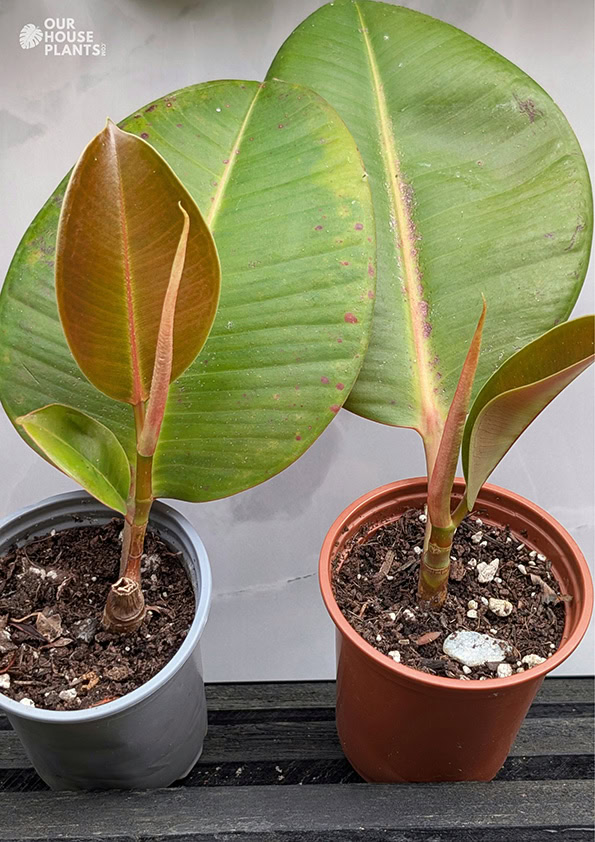
Two of the original cuttings finally produced small new leaves, with another beginning to emerge. It took far longer than I expected, but the cuttings had not failed after all.
So what triggered the new growth for me? I cannot say for certain. More growing time, warmer summer conditions, brighter outdoor light, the extra compost and a larger moisture reserve may all have played a part.
The useful lesson is that a rooted Rubber Plant cutting can remain alive and apparently dormant for a long time before it begins to grow visibly. So if yours is still green and alive, keep going!
If your Rubber Plant cutting has roots but no new leaves, don't assume it has failed. It may be concentrating on establishing a stronger root system beneath the compost first. But if it has been unchanged for many months, it's worth checking a few things.
There is sometimes no dramatic problem to fix. A cutting has to adapt from water to compost, build new soil-suited roots and store enough energy before it can produce a fresh leaf shoot. If the stem is firm, the original leaf is still healthy and the roots are not rotting, patience may genuinely be the right answer.
Roots don't necessarily stop growing when they reach the side or bottom of a pot. They can branch and continue filling the space available. But a very small amount of compost provides less root room, dries faster and holds a smaller reserve of water and nutrients.
That may have contributed to my own slow results. I had deliberately used very little compost to reduce the chance of overwatering, but may have taken the idea too far in the other direction.
It's sensible to avoid keeping a newly potted cutting wet, but young plants can also struggle if their small root ball repeatedly becomes bone dry. Tiny pots in warm or bright positions can dry much more quickly than expected.
Aim for balance: the compost should have some moisture while the cutting establishes, but it should never remain saturated and airless for prolonged periods.
A one-leaf cutting depends heavily on that leaf. It's the main source of energy while the roots develop and the plant prepares its next growth. Keep it somewhere bright, but protect it from harsh direct sun that could scorch or dehydrate it.
I found small numbers of thrips on my cuttings several times during the long waiting period. That may have contributed to the slow growth because each cutting had only one mature leaf.
Look carefully at both sides of the leaf, along the stem and around any new growth. Silvery scarring, tiny black specks, distorted foliage and small moving insects can all point to thrips. If you find them, deal with the problem promptly using my guide to getting rid of thrips.
A cutting with one node and one leaf can work, but it has little margin for error. A larger tip cutting with two or more healthy leaves may begin with more stored energy and greater photosynthetic capacity. On the other hand, it also loses more moisture through those leaves.
I cannot say that a bigger cutting would definitely have grown faster. But if I repeated this experiment, I would test both types side by side.
My cuttings began growing after being outdoors in sheltered shade during the summer. The warmer temperatures, longer days and brighter natural light may have helped.
That does not mean every stalled cutting should be moved outdoors. Cold nights, direct sunshine, wind and pests can all cause problems. If you try it, wait for reliably warm weather and introduce the plant gradually to a sheltered position without strong direct sun.
Success! Finally, two of my Rubber Plant cuttings are growing again, each with two new leaves and a third on the way.
This is usually rot. Remove the cutting from the water and trim away all soft or discoloured stem using clean scissors. Put any firm, healthy remaining section into fresh water. If rot has reached the node, the cutting may not recover.
To reduce the risk in future, keep the leaf above the water, use a clean container and replace water when it becomes dirty or unpleasant.
Empty the container, rinse it thoroughly and refill it with fresh water. Check the cutting before returning it. If the base is firm and healthy, it should be fine. If it is slimy or soft, trim it back to healthy tissue first.
A single-leaf cutting depends heavily on that leaf, so yellowing is not ideal. It can be caused by low light, stress after being cut, root problems, poor watering after potting or pest damage.
Check the stem and roots. If the stem remains firm and the roots are healthy, the cutting may still recover, although it will need to produce new growth before it can become a strong young plant.
Check the root space, potting mix moisture, light levels and pest situation. If all seem reasonable and the cutting is still firm and healthy, give it time. Rooted does not always mean it's immediately ready to grow above the compost.
You can use a leaf if it has a small piece of stem and a viable node attached. A leaf without a node may form roots, but it is unlikely to produce a complete new Rubber Plant with a fresh stem and new leaves.
The water-propagation part of this experiment worked. All four cuttings formed substantial roots in around three months. Most of the uncertainty came after they were moved into compost.
If I repeated the experiment, I'd still root the cuttings in water. But I'd use pots with slightly more compost around the root systems, monitor moisture more closely during the transition and deal with any thrips immediately.
I would also take a mixture of small one-node cuttings and larger tip cuttings, then compare how they perform over time. The smaller cuttings clearly can work, but a larger cutting may have more reserve energy to draw on while it establishes.
Most importantly, I wouldn't assume that a rooted cutting had failed simply because it had not produced leaves. Mine took an exceptionally long time, but two eventually started growing again.
If your own cutting has a firm stem, healthy roots, a functioning leaf, enough light and no serious pest problem, check its growing conditions before giving up. It may be slow, but it may not be finished.
Propagating a Rubber Plant is well worth a go. It's pretty easy and the plant does most of the hard work itself.
Over the last 20 years, Tom has successfully owned hundreds of houseplants and is always happy to share knowledge and lend his horticulture skills to those in need. He is the leading content writer for the OurHouseplants Team.

Hi, I'm Tom!
If you're like me and enjoy the challenge of growing houseplants and getting them to thrive, then OurHouseplants can help. This website shares my knowledge and years of growing plants and provides my advice on properly caring for your indoor plant friends.